If you have spent any amount of time in a motor home you know that waste management is one of the major concerns. As someone who lives in an RV, you must need to learn how to dump RV tanks, where and when. Health and sanitation are important not just for you but also the environment.
What is The RV’s Black Water Tank?

The black water tank is usually placed under the toilet, so it contains human waste, tissues and toilet water. It is also known as a waste water tank. If your RV doesn’t have a gray tank all the water goes here, but if you’ve got a gray tank, that is where water from the sink and shower end up in.
Complete Guide - How to Dump RV Tanks?
Before you dump your water you’ll need to prepare the following.
- Garden hose to rinse
- Hand sanitizer
- Clamp or hose elbow
- Wastewater hose
- Disposable gloves
1. Get Level
Some dump stations are set on uneven ground that may make it difficult to empty the tanks. If that is the case you’ll need to pull down the jacks and level the surface so you can dump.
2. Windows And Fans
Once you get to the dump station, turn the fans off and close the windows so the smell doesn’t get all over the RV.
3. Gloves And Disinfecting Wipes
Anytime you’re emptying the black and gray water tanks, always wear disposable wipes and gloves for safety and sanitary reasons.
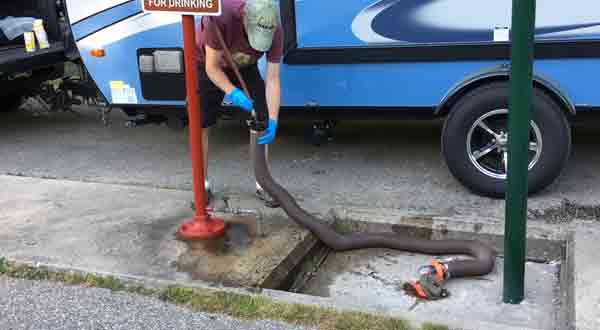
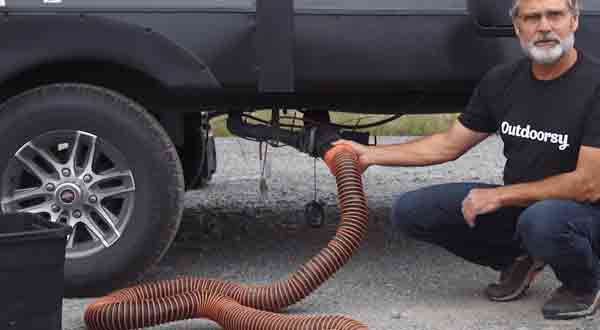
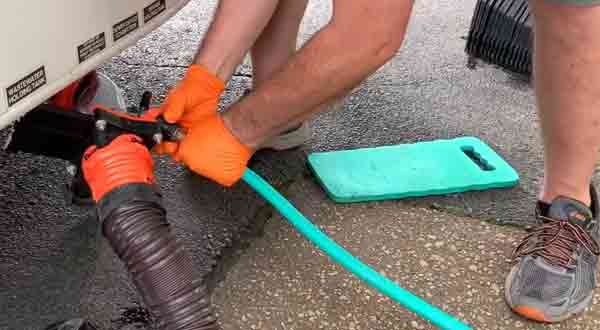
4. Connect The Sewer Hose
Use the hose and elbow attachment on your RV to determine what gets out of the tank. A translucent design helps you check for signs of clogging. Sewer hose support devices are also available if there is a clog.
Ensure all the connections are properly set, otherwise the tank might spill everything and make a big mess.
5. Dump The Black Tank

Open the gate valve on your RV then open the black tank valve. Not all RVs have a gate valve but I suggest you get one as it can prevent accidental spills when the cap is opened.
The gate valve also functions as another gate in the event one of the tanks starts leaking.
6. Spray Down The Black Tank
Hook up the black tank sprayer and the non-potable water hose. Empty the tank then turn the sprayer on. Keep spraying until the water gets clear. You can use a hose if you don’t have a sprayer: just point the hose in the toilet and spray it. Do this once the black tank is completely empty.
Another option is to pour five gallons of water in the toilet. Shut the black tank valve and unhook the hose from the sprayer. If you want the sewer hose to get sprayed, keep the connection on.
7. Dump The Gray Tank
Once you’re done with the black water tank it’s time to empty the gray water tank. The steps are the same as those of the black water tank. Turn the gray valve off after emptying the tank. Close the gate valve once all the water has been emptied.
8. Spray Sewer Hose
Only a non-potable water hose should be used on the sewer hose. Take care not to get splashed on and do this while there is a connection to the sewer.
9. Disconnect Sewer Hose
Continue draining the sewer liquids until there is nothing left. Disconnect the hose. Get the swipes and disinfectants and clean the hose. Put the hose in its container in your RV.
10. Put Everything Back
Return everything in the dump station the exact way you found them.
11. Treat The Tanks
There are many products for treating black and gray water tanks. Buy one that is suitable for your RV and apply it according to the directions provided on the label.
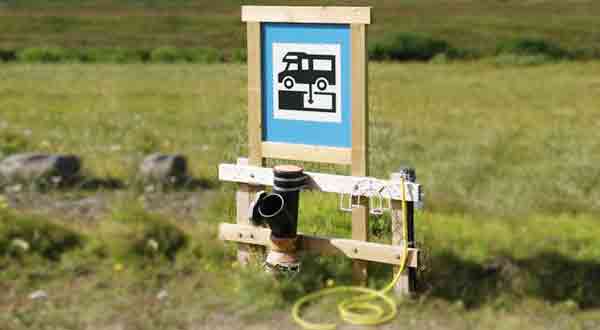
12. RV Dump For Free

There are apps and sites that guide you to free RV dump stations. The quality ranges from the excellent to the not so good. Some free dump stations have all the essentials and you just need to pull over and do your thing. Others are bare bones with just a sewer connection. In these cases you’ll need to supply the potable and non-potable water.
The bottom line is majority of free dump stations come with non-potable water, but connections for potable water are hard to come by.
13. RV Dump For A Fee
These sites are all over the country including RV service stations, gas stations, truck stops and RV parks. The fee can be just a few bucks or it could be more than $25 depending on the location and the amenities. While you need to pay a fee you’re assured of potable and non potable water.
14. Full Hookup Sites
If you happen to be at a full hookup site you can hook up the electric and water, but it’s all right not to connect the sewer until it’s time to dump. If you decide to hook up the sewer, keep the tank valves shut until it is time to get rid of the waste.
It’s all right to keep the gray valve open, but there are some who like to keep it close so odors and critters don’t end up in the hose. This only applies to the gray tank as the black tank valve should never be opened until you’re ready to remove the contents. If you open the valve the black tank the liquid will seep out and leave the solid waste behind.
15. The Bag Of Ice Trick
After you’re done emptying the tanks, pour some ice cubes down the toilet. The ice is supposed to dislodge any clogging there. Some swear by this method and others say it doesn’t work. Whatever the case may be, it’s not a good idea to not solely rely on this method to fix a clogged toilet.
16. Additional Black Tank Treatment

Before you connect the hoses, you should charge the black tank with your rinser and a few gallons of water. You can also do this while cleaning the tank. Either way what’s important is you wet the tank bottom. Doing this is necessary so the waste spreads evenly and breaks down for easier cleanup.
Read the directions for proper use of the black tank treatment. Most require you to mix a gallon of water, then add a scoop of the treatment and flush right away. The 1 gallon is just an idea as your tank may need something bigger.
If you’ve got a 40 gallon black water tank for instance, repeat the stops above but use two gallons of water instead. With most treatments there is no need to add more than a scoop even if you add more gallons.
17. When Is The Right Time To Empty The Black Tank?
One of the biggest misconceptions is that you need to empty the black water tank frequently so it will be easier to clean. But that is not the case and it will actually make things worse.
If you empty the tank while it is less than halfway full, it will only have a small amount of water in it. Do you know why toilets have water? Yes, it helps dissolve the mass and the same rule applies with black water tanks.
If there is not enough water the solid waste will remain stuck in the tank. If you open the tank the mass will be stuck there and you’ll need to fill it up with water to dissolve them. That is why it is better to just let them dissolve in water.
So do you have to wait until the black tank is full before emptying it? No, you can remove the waste when the tank is 2/3 or 3/4 full. When it reaches that level, empty it the same way you would the gray tank.
Once you’ve dumped the waste material, rinse it thoroughly to make sure nothing is left. You can use a hose or a tank wand to get rid of any waste matter that is stuck.
Here are a few other things to keep in mind.
- If there is odor emanating from the toilet there might be waste or bacteria in it. Fill it up with water and flush. Dump the tank as you did before. Fill the tank up again and add some treatment and flush. Repeat this until the smell is gone.
- There are a lot of treatments for black and gray tanks so it is just a matter of finding the right one. Buy a small bottle at first and if you like the results, you can buy a bigger on later.
- Never clean the black water tank without wearing gloves. Eye wear may also be necessary in case the waste suddenly spills.
Part of living in an RV means properly managing your waste, so learning how to dump RV waste is a skill you need to learn before you actually go out on the road. And remember to schedule a cleanup so your RV septic system is clean and clog free.
Thanks for letting me know about RV Dump services and how they can help get rid of the waste in my RV and provide me with the water I need for it in the future. I’m borrowing my uncle’s RV and since I don’t know much about this thing I thought I’d do what I can to return it in a good state. I’ll be sure to look for an RV dump service nearby before I return it to my uncle so that he gets it back nice and clean.
Sure. 🙂
Great to hear.