It’s hardly anyone’s favorite topic but learning how to build a RV septic system is critical if you spend lots of time in your rig. Put it simply you can’t turn that RV into a motor home without a septic system set up.
Basic Components of the RV Septic System
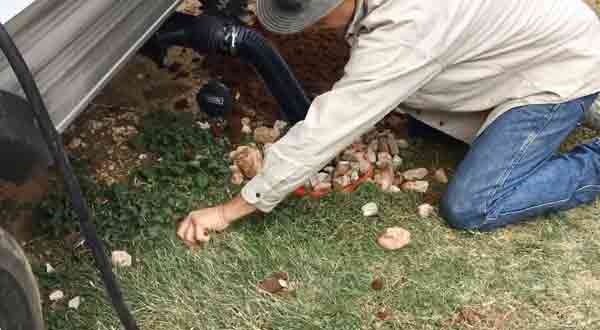
RV septic systems range from simple to intricate but they often share specific components. Most RVs have at least the following.
- Gray water tank – this tank holds the liquids from your sink and shower. It does not contain the waste in your garbage disposal or toilet. This water is not potable but you can use it to wash your RV.
- Black water tank – also known as the waste water tank, this contains all the stuff flushed down your RV’s toilet and all the waste in your shower and sink.
- Dumping system – the configuration varies from RV to RV but the principles don’t change. You hook up a sewer hose onto the gray or black tanks and empty them in a dump facility.
How to Clean RV Black Water Tank?
A lot of problems with septic systems can be avoided with proper maintenance and planning.
1. Enzymes and Waste Tank Solutions
There are waste tank chemical solutions available which break down the wastes in black water tanks. They may be active cultures or synthetic, it doesn’t matter as long as you make sure they’re suitable for RVs. Don’t use toxic solutions as it might damage the tank.
2. Clean Your Tanks
There is a debate on whether to empty the tanks when they’re full or 3/4 of the way. I prefer emptying them when three quarters of the way because allowing the tank to fill up can be risky.
Always wear gloves when you clean both tanks. The black water tank should always be flushed before the gray. Keep your RV septic system healthy with regular flushing, cleaning and sanitizing. There are several cleaning solutions available specifically for RVs.
How to Build a RV Septic System in 17 Steps?
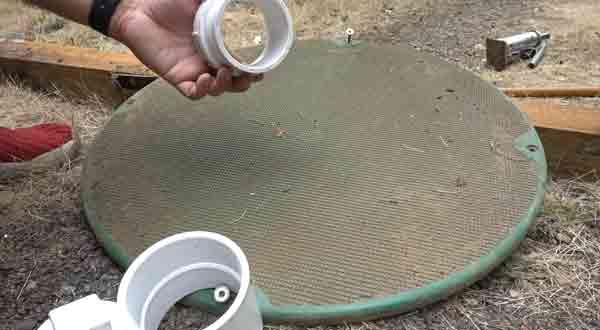
You can build a septic system for your RV by modeling it after a regular septic system, only it is smaller. Before you begin, check the local zoning laws and get whatever permits are necessary.
Tools and Materials You’ll Need
- PVC pipes and elbows
- Shovel
- Paper rosin
- Tape measure
- Pipe glue
- Perforated PVC pipes
Step 1
Find the main sewer pipe for your RV.
Step 2
Connect a 5 to 10 ft PVC pipe piece on the plumbing emanating from your RV. This is the pipe that horizontally extends and is secured by a clamp.
Step 3
Use a tape measure to find the distance between the tank bottom and the inlet hole. Find the hole depth from the pipe bottom.
Step 4
Get a shovel, dig a hole and set the tank according to the figures you got. This will be your septic tank and will act as a separator for liquid and solid waste.
Step 5
Set the inlet from your rig drain in the tank. Make certain it is a snug fit.
Step 6
After the tank has been leveled, fill the area around it with dirt.
Step 7
Get an elbow pipe and glue it on the drainpipe’s end. The elbow should face down in the direction of the tank bottom.
Step 8
Dig a ditch ten feet deep along the outlet hole near the tank’s end. Pitch about 1/8” per foot.
Step 9
From the outlet hole, install a PVC pipe up to the trench’s end.
Step 10
Find the outlet pipe and attach a PVC elbow to it. The elbow should be directed towards the bottom of the tank.
Step 11
Go to the end of the trench and dig a ten foot hole.
Step 12
Fill the holes with some stones and fill the hole along the pipe bottom.
Step 13
Get a 4” perforated PVC pipe on the solid end of the PVC pipe. Make sure the perforated PVC pipe ends in the center of the hole you filled with stones. Slope it along 1/8 of an inch per foot.
Step 14
Put stones over the perforated pipe. The stones around the pipe must be four inches over it.
Step 15
Put rosin paper over the stones so ti doesn’t mix up with the dirt. After you pack in the dirt the rosin paper is going to dissolve and the dirt won’t combine with the stones.
Step 16
Place the lid on the tank.
Step 17
The last step is back filling the dirt in the trench.
RV Black Water Tank: 6 Things You Need to Know
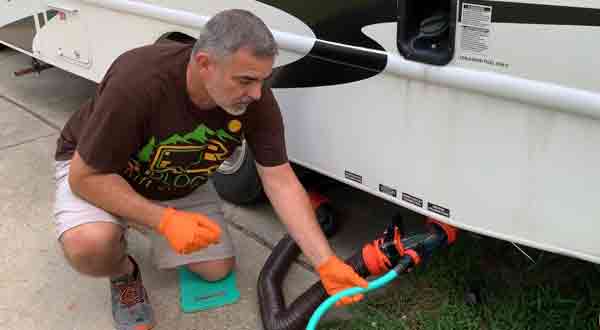
This is one of the topics that people don’t want to talk about, but if you don’t know how to clean RV black water tank you’ll end up with a big mess.
If you’re going to live in a motor home then you’ll have to face the reality of waste management and disposal. Yes, there are RVers who don’t bother with the black tank. They just park their RV where there is a public toilet
But what if your RV breaks down in the middle of nowhere? And what if you end up in a place that doesn’t have public toilets? And who doesn’t prefer a private bathroom over a public one? If you belong in that category then it’s worth learning how to clean and manage a black tank.
1. Background
A black water tank serves as the repository for everything that gets flushed in the RV toilet. Most RVs also have a gray tank where water from the kitchen sink and shower are stored. This water does not contain any of the waste in your RV, just the water. It’s called a gray tank because the soap residue gives it that color. The black water tank contains solid and liquid waste so you have to properly dispose of it.
2. Start with the Right Base
The first thing you should do is make certain there is some water in the tank. The water serves two purposes. First it prevents odor from spreading all over your RV, and second it keeps solid waste from sticking to the sides and bottoms.
3. RV Black Tank Chemicals
Once you’ve got water, add black tank chemicals in it to further reduce the smell and prevent waste from sticking. There are a lot of RV black tank chemicals available in a variety of scents and styles.
If the chemical has been formulated specifically for black water tanks then you’re assured it is environment friendly. Pour the chemical in the tank and it will dissolve the waste and prevent the odor from building up. The instructions for adding the chemical varies from product to product so read the label.
The capacity varies from bottle to bottle but a couple of ounces is usually enough for 3 days or so.
4. Emptying Your RV Black Tank
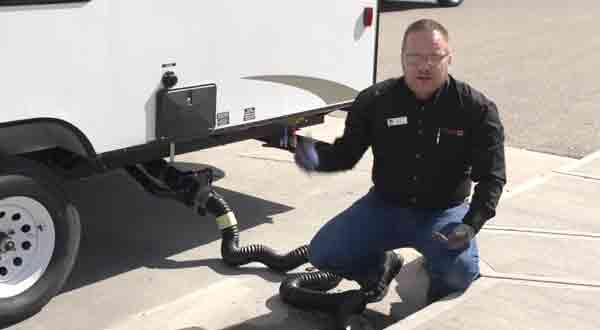
If you’re about to leave the campground but your tanks are not yet full, fill them with water and dump in the station.
Look for a campground or other locations where you can safely dispose of the waste. When you find a facility, connect your waste hose on your rig and fasten the other end onto the dump station.
You’ll empty the gray and black water tanks but you must always empty the black tank first. When the tank are empty, close the black water valve. Open the gray water tank valve and empty it as well.
You have to empty the black tank first because the gray isn’t as dirty. This way you can use the cleaner gray water to remove any residue in the black tank.
5. RV Black Tank Flushing
Emptying the black water tank regularly is just one part of the maintenance aspect. You also need to do a more comprehensive cleanup of the black water tank. Tissues and waste can accumulate and clog your toilet so maintenance is a must.
There are two ways to flush a black water tank. The most widely used is the black tank flush valve. Most RVs have this so it’s probably the best option. Just connect the hose to the rinse valve and let the water go into the tank. Flush it and you’re done. This is the easiest method.
If your RV does not have a flush you can install an aftermarket black valve. There are many types of aftermarket flush valves and they’re compatible with most RVs. Usually you just need to drill a small hole in the black water tank to install the valve.
The last method is to manually clean the black tank. To do this you’ll need a garden hose extension or RV tank rinser designed to spray water in various directions in the tank to remove tissue and debris.
If you’re going to utilize a holding tank rinser you have to be certain the rig isn’t connected to a city water system and your rig’s water pump is shut down.
Once you’re sure, open up the RV toilet flush valve and put the tank rinser in so it enters the black water tank. Turn on the water and the hose will spray water throughout the tank. Twist and turn the rinser so it can reach all around the tank. After hosing, empty the tank like you usually do.
6. Portable RV Waste Tanks
If you camp for extended periods in places where there is no sewer connection, you’ll benefit from a portable RV waste tank. As the name suggests these allow you to empty your black and gray water tanks via an external tank.
After emptying the tanks you can take these to a dump station. These tanks have a handle and wheels for easy transportation so you can quickly pull the tank to the station.
There are many types of RV portable waste tank, but they all need to be taken care of, flushed and cleaned like a regular black water tank. Follow any additional instructions given there.
Additional Tips for RV Septic Management
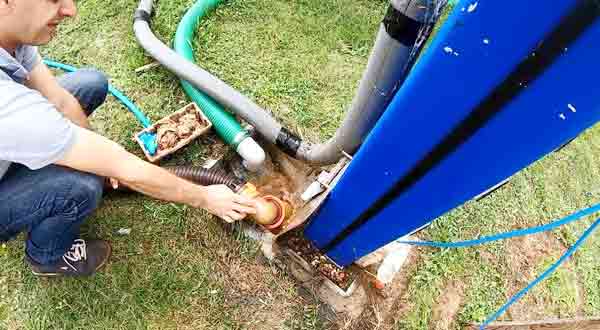
Make sure you use only legitimate dump stations. Some of the free dump facilities are poorly maintained or have chemicals harmful to your RV hose and tank.
Do not use any chemical with formaldehyde as it can damage the tank. Buy only from reputable sources so you’re assured the chemicals are safe.
Clean up after you’re done using the dump station. Wash away any residue and leave the place as you found it. These dump stations will only remain available if RVers are responsible in disposing waste, so do your part.
Inspect the tanks on a regular basis. Set a time, at least once a season, where you will conduct a thorough cleaning of the tanks. It is best to schedule this during your RV maintenance so you’ll clean everything in one go.
Keep stock of your RV couplings and connectors. Ensure there is enough for your tanks, and keep in mind there are cases wherein you have to hook up a couple of hoses to get to the sewer connection.
Do not settle for anything less than a heavy duty waste water hose. Cost has gone down and you don’t want to get stuck with a malfunctioning hose while emptying a black water tank. It is also a good idea to keep a 10 and 20 ft hose.
No matter what kind of hose you use, do not drag it on the ground as it might lead to punctures or rips.
If you’re going to stay at a campground for a while, it is all right to leave the gray tank valve open a little, allowing it to drain. But do not do this with the black water hose.
The septic tank is an essential part of living in a motor home. It’s a topic that no RVer can ignore for obvious reasons. While it’s an unpleasant business you’ll need to learn how to maintain it and make sure that the septic tank works properly.
Recommended To Read:
Steps 8 and 11. “10 feet deep”. Really?
It is suggested for using long term. If you want to make it smaller then you can do that.