If you own an RV, knowing something about RV generator repair will come in handy at some point. There will be times when a technician isn’t around. If you know how do a bit of repair you could perform it yourself and save money. At the very least you’ll be able to tell the repairman what is wrong.

RV Generator Repair: 8 Common Causes of Damaged Control Circuits
1. What The Control Circuit Board Does
The circuit board serves as the regulator for a lot of RV generator components. It controls the stop and engage ignition, the automatic shutoff due to low oil pressure, electric choke operation and other controls.
2. Dirty Control Board
This keeps the control board grease and dirt free. Use a de-greaser to remove grease and a #2-26 for electric contact cleaning. Apply some light acrylic resin conformal protective coats on the no terminal and the printed circuit side.
3. Distorted Female Sockets
You’ll need smooth nose needle pliers to get these pliers back in shape. The distortion is often due to excessive use in hot temperature. If these socket see a lot of use, inspect them regularly to avoid problems while you’re driving.
4. Incorrect Voltage/Resistance on the Terminals
Use a voltmeter to inspect the control board terminals. The 11 to 1, 10 to 1 and 9 to 1 terminals must register above 10 volts DC if the starter is activated. Inspect the fuse if the voltage reading is lower.
5. Terminals Corroded
Inspect the terminals regularly for corrosion. Use an antioxidant grease tor remove corrosion and provide extra protection. You have to replace the K2 and K3 terminals if they are heavily corroded, burned and no longer work.
6. Burned-Out Diodes
Kick backs from a high powered choke solenoid can damage the CR6, CR5 and CR1 diodes. If CRt5 fails it will also damage CR7. You’ll have to replace them with 1 amp, 400 volt 1N4004 diodes.
7. Low Charge On Battery
Use a voltmeter to check the battery to make sure that it has enough power. If it’s charging and with sufficient power, apply antioxidant and anti-corrosive protection on the battery terminals and cable ends.
8. Low Oil Pressure
Control circuit board terminal 12 will get damaged if there is insufficient oil pressure. If you suspect this is the case, take off the connecting wire for terminal 12 and asses the resistance.
The resistance needs to show 0 ohms or close to it. If so, reconnect the wire, turn the engine on and shut it down. There needs to be a 3 to 5 second delay prior to the engine stopping. If there is none, you’ve got a damaged circuit board that needs to be replaced. Do not attempt to fix the circuit board if it’s been badly damaged, just repair it.
RV Window Repair: Tips For Extending The Life Of A Window Seal

1. Using The Proper Seal
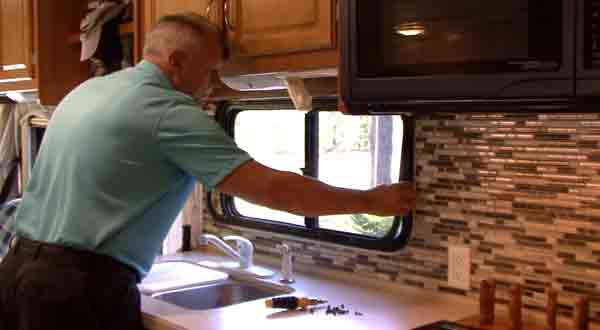
Use a seal that is suitable for your RV. Make sure the seal is all-weather so you don’t have to do any patch up job. Follow the instructions for proper application. The steps may vary depending on the product.
2. Removal Of Old Seals
Don’t apply new seals until the old one has been completely removed including the residues. Unless the old seal is completely taken off, the new seal won’t do you much good. This can be a rather tedious task but it is important if you want that new seal to hold.
3. Working With Adhesive
The best seal to use is usually the one that came with your RV, as you’re assured it’s going to work. Put the adhesive on as directed and give it a few minutes to build up the consistency described on the label. Now you may apply the seal.
The time it takes for the adhesive varies from product to product. Follow the guidelines on the label to get the best possible results.
4. Protecting The Seal
You’ll get more out of the seal by keeping your RV out of direct sun exposure. Just park your rig under awnings or any other shade available. If direct sun exposure cannot be avoided, allow the temperature to stabilize before you roll the windows down.
5. Keeping It Clean
This one is simple enough. Don’t allow dust, grime and dirt to accumulate as it will take its toll on the RV. Wipe the windows, spray with water to remove dirt and just keep the exterior and interior in good condition. Do this and you’ll be able to prevent a lot of of the problems that would otherwise arise.
6. How To Repair RV Generators

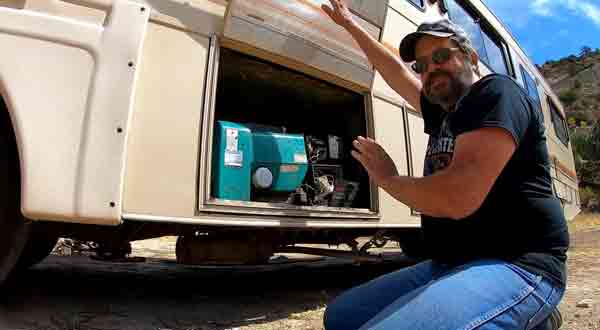
Generators are comprised of various complex parts. If the fuel level drops to 50% or under, the generator may automatically stop. Other problems may be due to exhaust or battery issues, but there are ways to fix these common problems. The following are some of the steps you can take to resolve those issues.
Required Materials:
- Preservative
- Screwdriver
- Air pump
Step 1
Remove the corrosion and rust along the wire lines using the air pump. Get rid of as much of the corrosion and rust as possible as it can improve performance significantly.
Step 2
If the exhaust system isn’t working, pull it into the metal straps carefully. The straps are along your RV’s perimeter so they won’t be hard to see. Fasten the screws so the exhaust pipe doesn’t move around.
Make certain the exhaust system is set just beyond your rig’s rim. This is important to ensure that carbon monoxide doesn’t enter your RV as you run the generator.
Step 3
You should get rid of moisture that accumulates as soon as possible. Run 1/2 to 3/4 rate load to give it a good workout. Doing this enables the generator to build up heat that will dissipate moisture.
This also serves as engine seal lubrication and prevents carbon from accumulating. The lubrication and engine seal lubrication will go far in preserving your RV and making sure that it is in good condition.
Step 4
You should also use a preservative to keep the fuel system from surging. If you haven’t used the RV for a long time, give it a good workout as described in the previous step and use a preservative. The combination of the two will do a lot in terms of getting the RV in shape.
Step 5
Is the house battery weak? Look at the wire lines and check for signs of corrosion. If there are, remove them in the manner described above.
Check the line as it goes from the generator set to the battery. Start up the engine and do a house battery reading. Place a voltmeter on the solenoid battery side. The trouble is a weak house if the reading is under 10, and you have to recharge the battery.
Tips And Warnings
- Perform regular maintenance of the generator to prevent damage. Doing so makes it easier to catch problems before they become serious.
- RV generators have different specs. Read the owner’s manual and follow the instructions as indicated.
Even the best, most powerful RV won’t last if it is not properly maintained. By following the tips and advice here, you’ll be able to keep your RV running and in good shape.
Leave a Reply