Learning how to wash an RV is necessary because RV wash services are few and far between. Unlike a car where you can just drive over and have it cleaned and scrubbed, with a motorhome you can’t find a lot of services that can handle their size. But if you know how the cleaning process works this won’t be a concern.
18 Step By Step RV Cleaning Tips
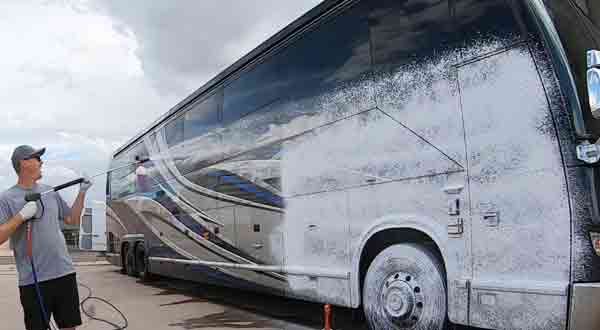
In the daytime, water spotting can be an issue while cleaning your RV exteriors. And unless you are fortunate enough to have a covered parking area for your RV or trailer, your best option is to clean the RV in the morning or evenings. We highly recommend that you take things forward in step by step manner.
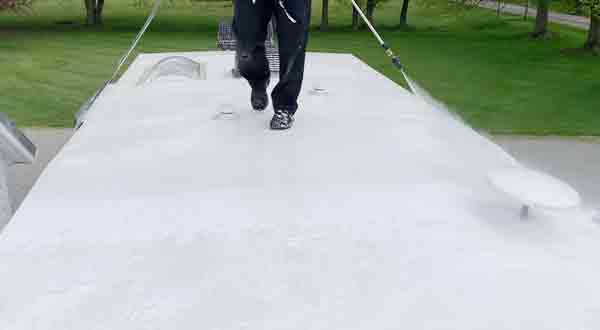
The best option is to start with the roof. Otherwise, you will have to deal with dirty water running down you already cleaned surfaces. Only move on to the sides, front, and rear once the roof is clean and dry. Starting with the roof also allows you to clean the most exposed part of the RV first.
1. Basic RV Cleaning Tools
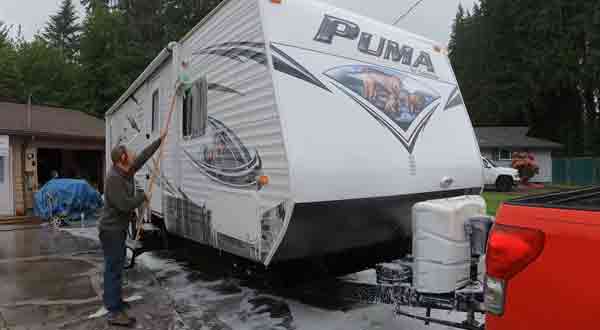
You cannot hope to clean an entire RV without some help from the right sort of cleaning tools. At the bare minimum, you should have a brush head and water blade, both mounted on poles for extended reach. Look for brush heads with soft synthetic fibers to protect the clear and gel coats on your RV.
Also, equip yourself with some good quality drying towels. And of course, you will need a good quality car wash shampoo to clean the RV.
2. Safety First
You don’t need us to remind you about the size of your RV. To reach all the surfaces and roof, you will have to use ladders. If you are not physically fit, or good with heights, this job is best left in the hands of others. If you fall off the roof, you could get seriously injured.
Use shoes with good grip to avoid any falls from the roof of your RV while cleaning. Boating deck-type shoes are perfect for this task, due to their nonslip grips. Never rush things in this job, as that can lead to mistakes and falls. Often it is better to have someone around to help you with the cleaning process.
3. What If You Live In A Water Restricted Area?
These days, access to water might be a problem. Back at your home, it might be due to water restrictions in your neighborhood. Out on a campsite or boondock, it might be due to lack of a nearby water source. In these instances, the best option is to use a waterless wash and mop system. You can clean and maintain your camper without a hose or pressure washer.
4. RV Roof Cleaning Tips
RVs usually have one of two main types of roof surfaces. Yours could be either fiberglass or EPDM/TPO, which is a form of rubber membrane. If you have fiberglass, you don’t have to take any extra precautions. But the EPDM/TPO surfaces require some extra care.
Rubber surfaces are vulnerable to petroleum distillate compounds. These are often core ingredients in strong cleaners and chemicals. Using such compounds will dissolve the rubber and break down your roof surface. Beyond that, the cleaning process is fairly straightforward.
Wash with water and a good quality shampoo, then rinse and dry. If you want, you can add a special layer of roof guard protectant to your rubber roof. This is simply an optional process, to make future maintenance hassle-free.
Fiberglass, though durable, tends to oxidize if left without a protective layer. Oxidised roofs have a distinct chalky appearance. In this event, you will need an ultra-strong cleaner to remove that oxidized layer. Once the roof is dry, don’t forget to look for any cracks or tears.
5. RV Side Cleaning Tips
All RVs have some common hotspots where dirt and grime tend to accumulate over time. The rearward side panels are often the worst affected, along with the front and the back. Start with one side and finish it before starting the other side.
And by “finish it,” we mean rinse, clean and dry it thoroughly. Avoid cleaning the wheels and tires with the same mop that use for the sides. It will get too dirty. If you use that mop to clean the other sides, you may end up damaging those surfaces. One all sides have been cleaned; you need to apply some protective coating.
6. The Front
This portion of the RV will see a lot of bug strikes during road trips. Removing all those squashed bug carcasses can be a real challenge! To remove them effectively, wet the area and then apply a dryer sheet. To clean those hard to reach areas, put the dryer sheet on a long brush and scrub the surface.
Often, you can make your task much easier with a simple preventive measure. A heavy wax coating makes cleaning much easier. So apply a generous dose of wax on the front of your RV.
7. Wheels And Undercarriage
These areas tend to have harder mud, dirt, and grime. So you will need a combination of a stiffer brush and a high-pressure water jet for best results. You will have several hard to reach surfaces to deal with here, including landing jacks, suspension parts, slide rails, and stabilizers.
If you can apply a dry type lubricant on these surfaces, it will make future cleaning operations much easier. On the wheels, use a generous amount of soap and water. Applying a UV protectant on the rubber is an excellent idea.
8. Windows And Slide Seals
For general cleaning, a simple combo of soap and water is best. After wiping those windows, apply a coat of Windex glass cleaner. Apply a protectant rubber conditioner on al, the rubber seals, and slide outs. Inspect all these seals, slides, and bug screens for any tears or damages.
9. Do I Really Need To Wax My RV, Camper Or Trailer?
Yes, yes, a hundred times yes! All RV surfaces are vulnerable to oxidization when exposed to the sun and elements. This includes fiberglass, plastic, gel coat, and clear coat paints. Oxidisation affects the overall appearance of your RV and also degrades the surfaces by making them brittle.
You have to options to prevent it; one is to wax it. An alternative is to use a sealant. Waxes are comprised of natural and organic components and have a relatively shorter lifespan. You can expect these to last for a few months at best. Sealant, on the other hand, is made from synthetic compounds. Some sealants will last for almost a year.
If you want lasting protection, sealant is the recommended product. But for those wanting a better-looking surface, wax is the preferred choice. Regardless of your choice, you should apply either of these products to enhance the longevity of your RV exteriors.
What Is The Best Wax Or Sealant For An RV?
The choice of best wax or sealant is entirely dependant on the kind of surface you have on your RV. Fiberglass and rubber surfaces require different products for best results. Check the next section for detailed answers.
What Is The Best Wax For RV Fiberglass Or Gel Coat?
Waxes and sealants are both further divided into two different categories. They are:
- Cleaner Waxes & Sealants – they contain abrasives and solvents. These are effective in dissolving and removing oxidation from RV surfaces. They can help smooth out any imperfections in the surface as well.
- Finishing Waxes & Sealants: They do not have any abrasives or solvents. They will offer a protective coating on your RV surfaces though.
If your RV fiberglass surfaces show heavy signs of oxidation, a heavy-duty cleaner wax or sealant is what you need. But if the surface looks free from any blemishes, apply a generous coat of sealing wax or sealant instead for protection against future oxidation.
What Is The Best Way To Apply Wax Or Sealant To An RV?
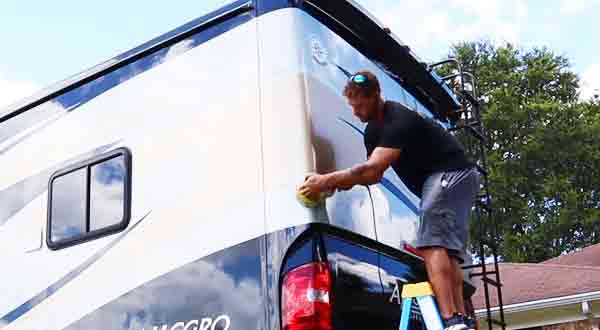
If you have the energy and grit, you can always try to apply the wax or sealant by hand. But RVs are extremely large, with a wide surface area to cover. So the best option is to use a dual action buffer. These buffers are also extremely safe.
But another less strenuous method involves using a mechanized too, called a dual action orbital polisher. This power tool can be used for paint corrections and sealant application on all sorts of vehicles, including cars, trucks, and RVs. For best results, you can combine this tool with a waxing flat pad.
Whatever your preferred method, always check the bottle of wax or sealant for directions. In most instances, it involves applying the wax to the surface using a soft cloth. Allow it to dry, and then buff it using a soft towel.
10. How To Polish RV Aluminum And Other Metals
These days, bare metal surfaces are very uncommon on most RVs. On the vast majority of surfaces, you will find polished metal. They usually have a powder coated or clear coated finish. For these surfaces, you don’t need any extra steps for polishing.
But in the case of bare metal, you will need to take some precautions. First of all, you have identified the type of metal surface on your RV. To do this, apply a small quantity of metal polish on an inconspicuous part of the metal surface. Use a soft cloth.
If it is bare metal, the cloth should turn black in a short while. With clear coated surfaces, there will be no change in color on the cloth. For bare aluminum and other metal surfaces, use a soft microfiber cloth and some good quality aluminum metal polish.
Apply the polish and rub it with the cloth until it turns black. Then use a clean cloth to wipe off the polish. Repeat this process several times for best results.
11. How To Protect And Maximize The Life Of RV Tires
RV owners often ignore their tires when it comes to regular maintenance. This is both wasteful and dangerous because it can lead to frequent tire changes, and increase the risk of tire failure and accidents. For improving the safety and longevity of your RV tires, you need to do more than basic cleaning.
You need to protect the rubber against ozone and UV rays. Both are agents of decay and destruction as far as all tires are concerned. Tire manufacturers do add some protective chemicals to modern tires. But these chemicals are located inside the tire, and will only find their way to the exterior with regular usage.
And in the case of RV tires, we all know that this does not happen in most cases, not even when you are a full-time RVer. The best thing you can do for your RV tires is to apply a coat of UV shield spray. Try to avoid tire dressing sprays that contain petroleum distillates, alcohol, and silicone.
They can do more harm than good. Look for water-based products with UV inhibitors. These will actually protect your tires from UV radiation without affecting the structural integrity of the tire surface.
12. Clean And Sanitize The Interior Of Your RV
The Challenges About How to Wash An RV?
There are a lot of challenges that arise from washing a motorhome. This is not just about the size but other factors. In this guide I’ll make things easier by going over the most significant areas so you’ll know how to clean them.
1. RV Size
RVs come in all shapes and sizes, but even the smallest RVs are way bigger than a car or van. A pop up camper is going to be quicker to clean than a Class A motorhome, but you’re going to have a hard time finding a campground that will give you the water and space to give it a thorough cleaning.
The best solution is to clean the RV at home. At home you have access to all the water you need and the materials as well. Plus you’ll be able to take your time. If you plan to live full time in an RV, you have to plan ahead as to how you’re going to do a thorough cleanup. Just like with a real house, you will need to go about this carefully.
2. Changing Water
Change the water regularly so dirt, grime and dust don’t just go to other areas of your RV. Scratches will also appear if you don’t replace the water. So if you don’t want your RV smudged, smeared and scratched, change the water.
Before you start the cleaning process, keep in mind you’ll be using a lot of water. Remember that in this process RV water pump is very important. And you should have a source ready ahead of time so you don’t have to look for a water source.
3. Pressure Washers
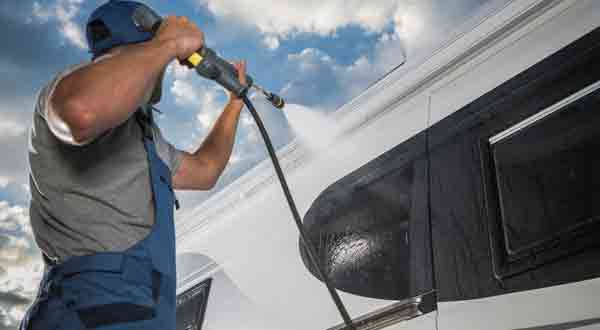
Do not use pressure washers near the gaskets as it could produce leaks. You should also avoid using the pressure washer on areas with malleable materials like silicone. Those sealed areas could come apart due to the pressure.
To be on the safe side just use a hose with sprayer and a brush. Bottom line, using a pressure washer isn’t always going to save you time. There are cases and instances wherein pressure washers will do nicely, such as removing large amounts of dirt and grime. Nut otherwise keep its use to a minimum.
4. The RV Body
How you wash the body depends on what it is made of. Check your owner’s manual for details and use the products recommended there.
A metal body is common for old RVs, typically stainless steel or aluminum. You start with a pre-wash to get rid of most of the grit and dirt. You then use soft brushes, non abrasive cleaners and mitts to clean the rest.
Fiberglass bodies are common in modern RVs as it is durable yet lighter than metal. Some have decals and others are painted. Regardless the best cleaning solution is the wash and wax as it cleans and protects the material at the same time. Be careful when washing the decals as they could come off with water pressure.
Painted metal bodies can be cleaned with any type of car wash cleaning solution. Just remember to use soft bristle so as not to damage the material. With all metal bodies you have to be careful when using pressure washers to avoid damaging the material.
Your RV could be made up of other materials apart from the three mentioned here. In that case consult the owner’s manual for information on what types of materials you can use on your RV.
Cleaning the exterior of the RV helps to keep it looking shiny and new. It also protects the surface panels against damage and helps to maintain the resale value of the RV as well. But the cleanliness of the RV interiors can have a more direct impact on your health and well being.
Living in such a closed and cramped environment can lead to a smelly and downright filthy interior. That is unless you take regular steps to clean and sanitize the interiors. Removing dirt and dust is a real chore, we agree, but it is an essential and unavoidable one.
13. Dusting And Vacuuming
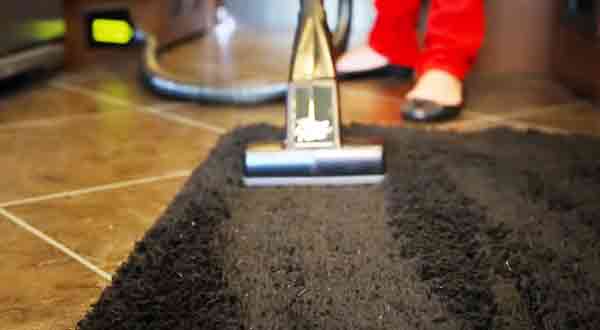
To comprehensively remove the dust from your RV interiors, you should use a trio of tools: a duster with long handle, a shop vac, and a compact handheld vac. With these three tools, you can clean all the surfaces, including the really cramped and hard to reach corners. After using the vacuum on kitchen surfaces, apply Windex or ammonia water to disinfect them. Windows, Mirrors and Window Treatments.
To clean plain/regular window surfaces, use Windex and a soft cloth. But first, check if any of these surfaces have a coating of solar film. If they do, they might be vulnerable to some chemicals found in cleaning products like Windex. Check your user manual or manufacturer directions for guidance on proper cleaning of these surfaces.
Remember to clean both sides of the windows. Cleaning mirrors inside an RV is a simple process. You can use the same methods you employ inside your home. But curtains, blinds, and shades can present some challenges. Try the following steps for best results:
- Stained roll-up shades should be cleaned with a damp cloth and some Windex. Wipe the affected surface with these products.
- For unstained roll-up shades, use a duster. For regular shades, use either your vacuum or hand duster.
- For shiny aluminum blinds, you only need to do some light dusting as those surfaces do not attract much dust.
- For blinds made from other materials, you will have to use mild detergent and a mop.
- Do this cleaning after removing the blinds and laying them on the floor.
- Day-night shades are very fragile and prone to. Breaking. Use extra care while vacuuming them. Wipe them gently with Windex and a damp cloth if they have any stains.
- Curtains with water stains should also be treated with Windex and damp cloth. Or else, you might have to send them for professional cleaning.
14. Dashboards And Upholstery:
First, vacuum the entire dash area using a vacuum. Use a handheld vac to reach the tight corners. Then clean all the vinyl or leather surfaces using an appropriate protector. This also includes the foot pedals and the steering wheel.
For fabric upholstery, spray some Febreze after vacuuming. Then cover the surface with a throw blanket. Consider calling a professional once a year to steam clean all the upholstered surfaces.
15. Toilet Cleaning
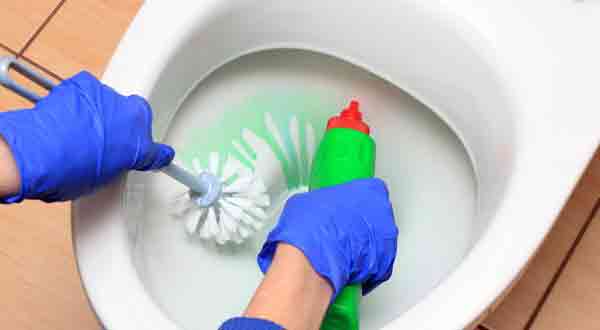
Focus on using cleaning and disinfecting the toilet and bathroom area. Try to avoid using products that may cause physical damage to the surfaces in the toilet. These include harsh brushes of any sort and any rags with harmful chemical residue. Cleaning the RV toilet is a weekly task, at the very least.
If you have an entire family living in the RV, you should clean the toilet more often. You need to the following components for best results:
- Disposable towels, paper if possible
- Water
- A disinfecting cleaner, ideally pine-based
It is quite clear that you don’t need a lot of specialized equipment or cleaning products to clean your RV toilet. An effective disinfectant cleaner and some soft material are all you need. You should stick to the following steps to clean your RV toilet:
- Add some cleaner and water to the toilet bowl.
- Clean and disinfect the rim using paper towels and cleaner.
- Do not forget to wipe under the rim
- Wipe and clean the flapper thoroughly
- Flush the bowl, after half-filling it with water
16. The Rest Of The Bathroom
RV showers are not like the showers in your home. They use lightweight and relatively fragile plastic parts inside the RV. If you use the wrong kind of products, you can damage and scratch these surfaces. Scratches then become breeding grounds for bacteria, dirt, and algae. They will eventually ruin the floors as well.
To protect these surfaces, the best option is to do some routine maintenance. With some simple cleaning measures after every instance of using the shower, you can reduce the chance of long-term damage. Use a dry towel or squeegee after each shower to wipe all surfaces clean. If there are any glass surfaces, apply some Windex or ammonia.
You can also use a gentle cleaning agent on all shower surfaces/bathtub. For other surfaces like sinks and countertops, use Original Windex and paper towels. Apply a germ spray afterward on all surfaces to disinfect them. Use ammonia water or pine-based cleaner on the floor to mop everything clean.
17. Holding Tanks
Holding tanks in RVs are extremely vulnerable to germs. If you allow these bugs to thrive, they can pose a severe health risk to anybody who lives in the RV. Cleaning and disinfecting the sewer tank is a particularly arduous and hazardous task, because of the noxious fumes it produces.
Cleaning these tasks is no simple task, and cannot be easily explained here. You should consult the owner’s manual for more detailed instructions and guidelines. You can also find detailed assistance on online RV forums.
18. Floors
We always complain that RV floors do not have enough space. Yet these cramped spaces are harder to clean than the wide open floors in your homes. Use the following focused techniques to get the best results while cleaning RV floors.
- For laminate floors, use a dry mop, lightly misted with a mix of water and vinegar. Use a microfiber mop for best results.
- For vinyl or ceramic floors, use either ammonia or ammonia water.
- Carpets should be steam cleaned, professionally is possible. Vacuuming them can be a chore and can be avoided by using protective runners made from adhesive plastic.
- You will have to replace those runners often, but they help keep the carpet relatively dust free.
- If the stairs are carpeted, cover them up using these runners as well.
- Use rubber mats in front of the stairs, and avoid wearing shoes once you reach the carpeted area.
- Sweep the floors after each trip, and clean the hard floors as well, with ammonia and water.
- Launder all mats and rugs as often as necessary, usually after each trip.
You Might Also Like: How to Choose Flooring for RV With Slides?
5. Awnings
Awnings are easy to clean as they only get dirty if you camp for long stretches at a time. Even then the most that they will accumulate is dust. In that case the only thing you need to do is dust it off. In some cases you’ll need to scrub the fabric but even that is easy to do.
While awnings are easy to clean, don’t neglect them. Just like with the rest of the RV, don’t wait for dirt to build up before doing something about it.
Relevant Article: RV Awning Replacement Fabric Choosing Tips from an Expert
6. Gaskets And Weather Seals
The gaskets and sealants have the same purpose, protect your rig from the elements. That’s why you have to be careful when cleaning these parts. If the gaskets are damaged you’ll need to have them replaced and that can be a hassle.
7. Wheels
RV wheels come in three types, chrome rims, aluminum wheel covers and painted rims. All of them can be cleaned using regular rim cleaners. If your RV has aluminum wheels, take them out every now and then and check for rust. Don’t use any abrasive cleaners on chrome rims as they’re very sensitive.
8. Roofs
The roof needs to be cleaned thoroughly as bird droppings, dirt, dust and other stuff accumulate there. If you’ve got an old RV it likely has a rubber roof. Black streaks are the most common form of dirt and you’ll need rubber cleaning products to remove them.
New RVs have fiberglass roofs and they’re simpler to clean. You can use the same materials you use to clean the RV for the roof.
9. Cleaning Contractors
If you’re busy and don’t have the time to clean your RV you may consider hiring contractors to do it for you. If you do opt for this route you’ll need to do some research and ask a series of questions.
Ask what type of cleaning materials they use and how much experience they have cleaning RVs. Ask what detergents, brushes and methods will be used on your RV. As I mentioned earlier some materials like chrome and parts like decals and gaskets need special care.
By asking these questions and listening to their answers, you’ll know how good they are and if you can trust them to take care of your RV.
Quick And Dirty Tips For Easy RV Washing And Waxing
If you have decided to do the cleaning yourself, here are some tips to get you started. The first thing you should do is buy the right supplies and tools. Second, wait for the right time to do the cleaning. This means avoid washing on rainy days and when there is excessive heat.
1. Wash And Wax Regularly
RVs come off the factory with protective coating, but constant exposure to the sun, wind, rain and roads cause it to wear off. By washing and waxing on a consistent basis your RV will still look good even when the factory gel coating comes off.
You only have to wash and wax twice a year to keep your RV in tip top shape. Not only that but the dirt and bugs don’t stick as easily on the surface either.
2. Don’t Use Dish Soap
Dish soap contains harsh chemicals that cause protective gel deterioration. Dish soaps may be cheap, but you will end up paying more once the gel comes off and the surface starts to deteriorate. Do your RV a favor and use a real cleaning solution.
3. Wash With Baby Shampoo And Vinegar
Baby shampoo and vinegar work well together as a cleaner. Unlike dish soap, baby shampoo and vinegar doesn’t leave film or other undesirable substances on the surface.
4. Try Waterless RV Washing
Want to take a different approach to cleaning your RV? Try waterless cleaning. It is an environment friendly solution and is also effective. This is gaining popularity among those who live in RVs full time who don’t want to consume too much water.
5. Don’t Use Microfiber Towels Or Brushes
Microfiber cloth and brushes contain polyester, a material that can wear off your RV protective gel. This damage can be permanent so it is better to use materials like lambswool or cotton baby diapers. To be on the safe side you should use only materials that are proven safe.
6. Get Rid Of The Bug Juice
Ever seen a bug strike your RV? Yes it happens quite a bit, and each time that happens acidic substances are left on the surface, damaging the gel coat. As the bug juice accumulates it causes serious scratches, so remove those as soon as possible.
7. Finish With Floor Wax
Floor wax isn’t just for floors as it is also good for your rig. Apply the wax after washing and your RV will look as good as new. Don’t apply too much, just enough and only according to the instructions.
Of course you don’t need to apply the floor wax if you have used a wash and wax solution. As long as the cleaning solution is for RVs you don’t have to worry about damaging the effects.
Knowing how how to wash RV is going to make things a lot easier. Rather than spend a fortune hiring a service to do it for you, why not learn how it is done and save money and time?
It is always great idea to cover your precious RV after a proper wash.
Leave a Reply